Memory quilts are a beautiful and meaningful way to preserve precious moments, celebrate special occasions, or honor loved ones. These quilts are a tapestry of memories, combining the warmth of a handmade quilt with the sentimental value of cherished fabrics and photos. Whether you’re new to quilting or an experienced sewist, creating a memory quilt can be a rewarding project. In this beginner’s guide, we’ll walk you through the essential steps to make your very own memory quilt.
1. Before you start your memory quilt, gather all the materials you’ll need. Here’s a list to get you started:
- Memory items: Collect the fabrics and textiles that hold sentimental value to you. This could include old clothing, baby blankets, T-shirts, or any fabric that carries memories.
- Additional fabrics: You’ll need backing fabric, batting (the middle layer), and binding fabric. Choose coordinating colors and patterns that complement your memory items.
- Quilting tools: Invest in a good-quality rotary cutter, cutting mat, acrylic ruler, fabric scissors, and quilting pins.
- Sewing machine: A sewing machine with a walking foot is recommended for quilting, but you can also hand-sew if you prefer.
- Thread: Select a thread color that matches your quilt top and backing fabric.
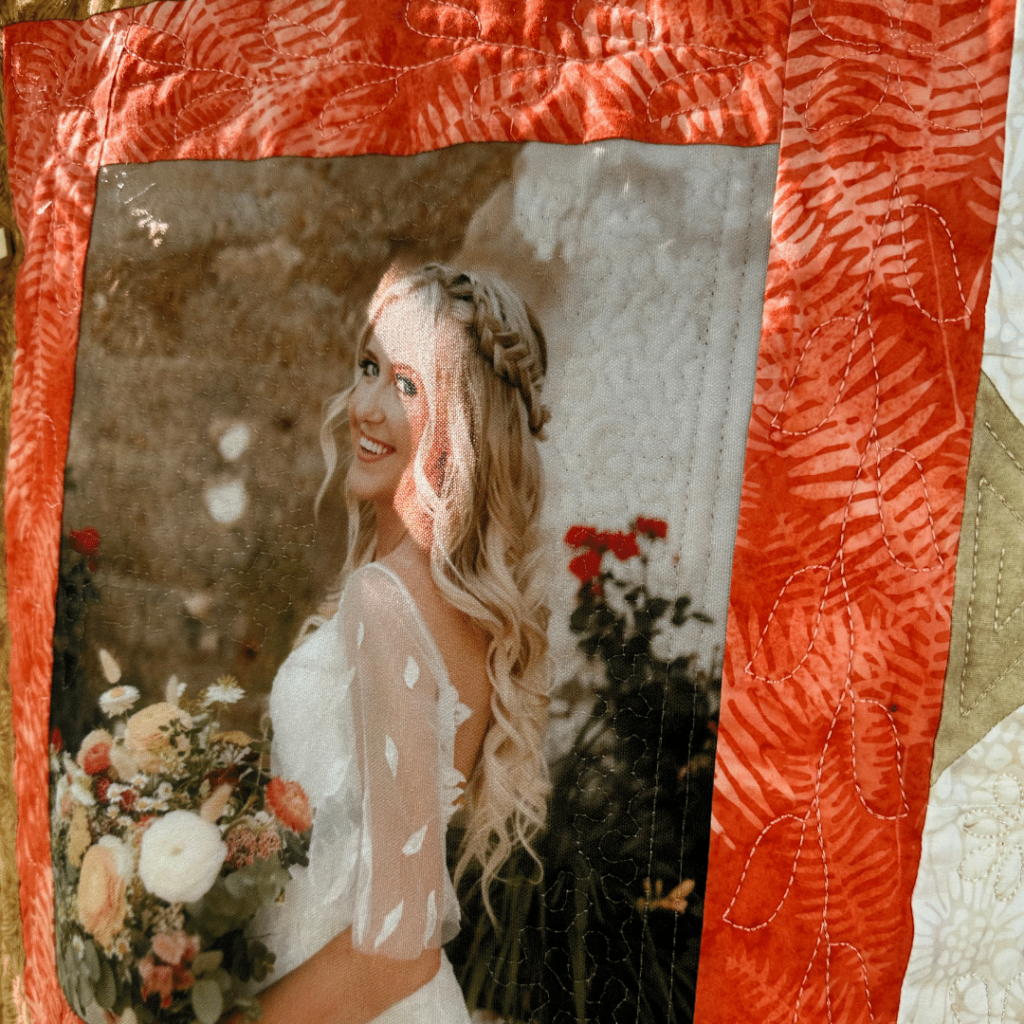
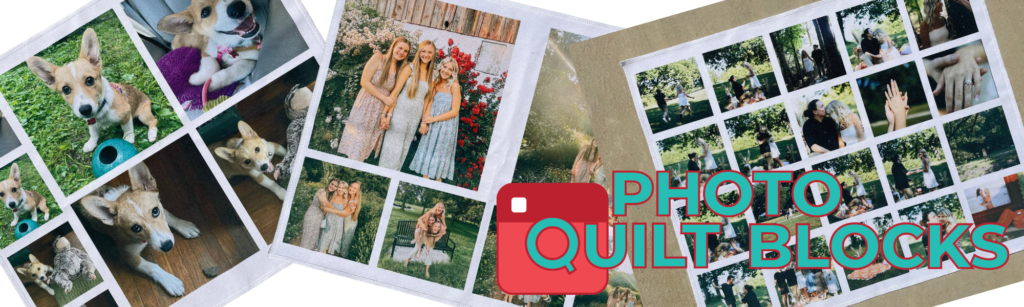
- Order your Photo Quilt Blocks to add to your quilt. A photo is a story, and a story is a memory…..so don’t forget your photo blocks! If you have a photo of the person or pet in the clothing that you are putting in the quilt, that is super special!
2. Plan your design
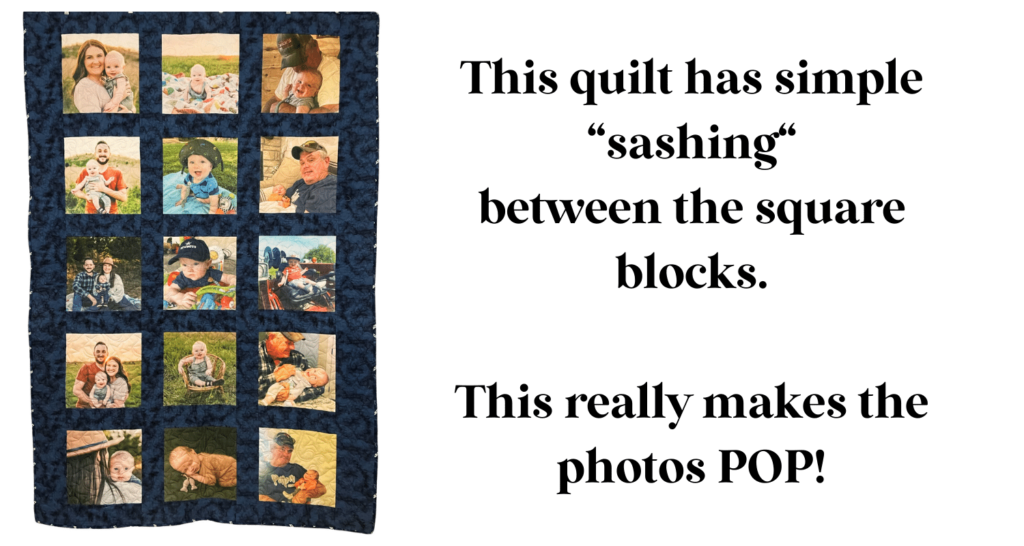
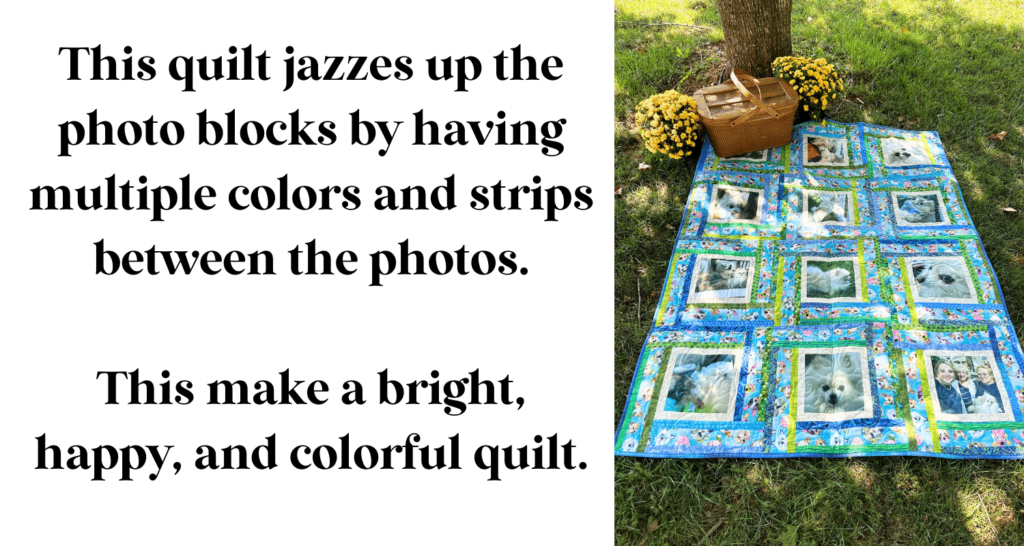
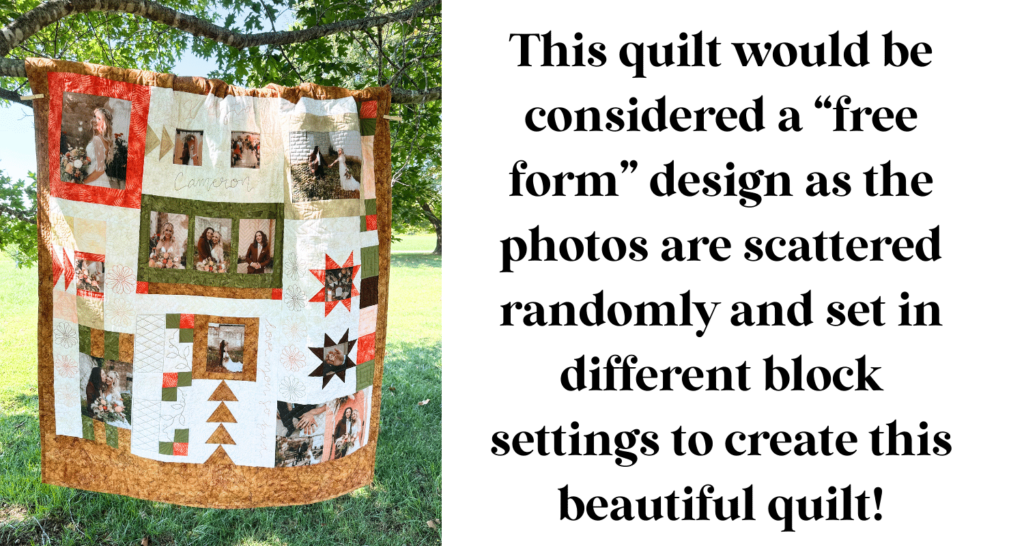
Decide on the design and layout of your memory quilt. You can opt for a traditional block design, or you can get creative with a more free-form arrangement. Sketch out your design on paper to visualize how your memory items will fit together. Consider using sashing (strips of fabric between blocks) to help tie the design together.
When you are including photos in your quilt, I find it better to print the photos first if you are wanting to coordinate the fabric with the photos. Sometimes the phone sees colors differently than the printer, so GET YOUR PHOTO QUILT BLOCKS FIRST!
3. Prepare your memory items.
- Prepare your memory items by washing and ironing them to ensure they are clean and free of wrinkles.
- Cut your items into uniform sizes and shapes according to your design.
- Consider incorporating different-sized squares, rectangles, or even appliqué pieces to add variety to your quilt.
- If you choose to include Photo Quilt Blocks in to your quilt, these will arrive ready to go! We fuse a sheer weight interfacing to the back of your blocks so that you don’t have to. Being that the blocks are 100% polyester, they are not going to shrink and are ready for you to cut apart and include in your quilt.
4. Piece together the quilt top.
Start piecing your quilt top together according to your design. Use a 1/4-inch seam allowance and press your seams open to reduce bulk. Take your time with this step, as accuracy is key to a polished-looking quilt top.
Check with your local Quilt Guilds if you are new to quilting! Typically they have classes that you can take to get started on this new quilting adventure!
5. Layer, quilt, and bind.
Once your quilt top is complete, it’s time to layer, quilt, and bind your memory quilt.
- Layer: Lay down your backing fabric with the right side facing down. Add your batting on top, and then carefully place your quilt top, right side facing up. Baste the layers together using quilting pins or a temporary spray adhesive.
- Quilt: Quilt your layers together using your preferred quilting pattern. You can choose simple straight lines, free-motion quilting, or even quilting by hand.
- Bind: Trim any excess batting and backing fabric, and then attach your binding strips to the edges of the quilt. Tutorials on binding techniques are widely available online for reference.
6. Add a personal touch.
Consider adding labels, embroidery, or other personalized touches to your memory quilt. A label can include the quilt’s name, the date it was made, and a special message or dedication.
When you order your Photo Quilt Blocks, be sure to include a quilt label in your order. You can add a photo and words to the block and then sew it on to the back of the quilt so the recipient always remembers you were the MEMORY GIVER 🙂
Caring for your memory quilt
Once your memory quilt is finished, it’s important to care for it properly. Machine wash it on a gentle cycle with a mild detergent, no fabric softer if you have included PHOTO QUILT BLOCKS and air dry or tumble dry on low. Regularly check for loose threads or wear and make any necessary repairs to ensure your memory quilt lasts for generations.
Photo Quilt Blocks are VERY WASHABLE. If you decide to print your own or use a different printing service, make sure you find out how well it washes! Many do not wash well or fade quickly, but not Photo Quilt Blocks 🙂
Creating a memory quilt for beginners is a labor of love that allows you to relive cherished memories with every stitch. With the right materials, a thoughtful design, and a little patience, you can craft a beautiful and meaningful keepsake that will be treasured for years to come. So, gather your memories and get started on your very own memory quilt today!
Happy Quilting,
Lori McCroskey / Owner
These are examples of our Fat Quarter bundles! You get more for your money, no waste on our end, and we can ship faster too!